Lacrimosa Scorch DoT

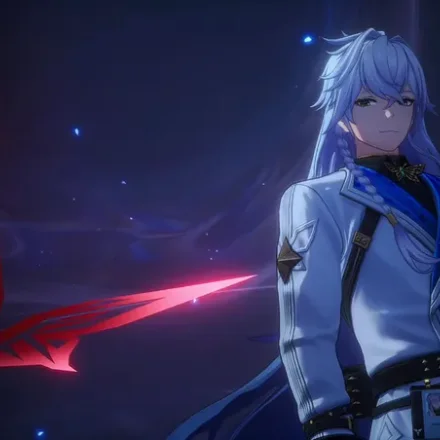


A sustained Scorch-DoT Discord comp that keeps enemies under constant Nightmare pressure — strongest in longer fights where the damage-over-time compounds.

Baicang is a 5★ Incantation character of the Bose arc who fills a DPS role and currently sits at the T0.5 tier. This placement marks Baicang as one of the stronger damage options in the meta, just below the very top of the rankings.
Only his signature Camellia Society is paywalled; F2P Baicang keeps most of his power on the farmable A Time Will Come, which adds survivability for his self-HP-drain kit. Crimson: Twin Butterflies is the recommended cartridge.
Recommended setups from community build guides (~June 2026); not the only viable option.
Baicang is a sustained Incantation main DPS who leans on damage-over-time pressure rather than burst spikes. His rotation drains his own HP to fuel aggressive output, so you commit to staying on-field, weaving Skill casts into your tempo while his A1 effects compound. The pattern rewards uptime: as Silence and Objurgate triggers accumulate during his offensive windows, each subsequent Skill hits harder and recovers cooldown faster, letting you cycle abilities more frequently the longer a fight runs. In team play he slots cleanly as the central carry around supports and sub-DPS who shield his self-drain and amplify Incantation damage. Hypercarry compositions pairing him with Daffodill, Sakiri, and Jiuyuan extract the most, while budget lineups keep his damage profile intact by adding survivability to offset the HP cost of his kit.
Prioritise his Ultimate first as the centerpiece of his damage ceiling, then his Skill, which his A1 loop directly amplifies and accelerates. Level Basic Attack next to keep baseline output respectable, and leave QTE for last. This order maximises the compounding Skill rotation that defines his sustained DoT pressure.
Run Incantation DMG on Slot 1 and CRIT Rate on Slot 2 to anchor both his element scaling and reliability. For substats, chase CRIT Rate first, then CRIT DMG, followed by ATK%, and finally generic DMG%. This ordering secures consistent critical output before padding raw multipliers.
Crimson: Twin Butterflies is the recommended cartridge and his best-in-slot module set, configured as Type 2, Type 3, Type 3, and Type 4. Allocate stats toward Incantation DMG and CRIT Rate on the primary slots, then funnel remaining rolls into CRIT Rate and CRIT DMG to feed his sustained Incantation DoT scaling.
Prioritise A1 first, as its compounding Skill damage boost and cooldown reduction define his rotation. Take A6 second for added performance, then A2 to round out his kit. This sequence reinforces the loop that lets his Skill casts snowball during extended fights.
Invest fully into his Ultimate and Skill progression first, since they carry his damage profile. Push Resonance through R1 Earth Sequence and into R2 where possible, and pair with survivability-oriented gear to safely sustain his self-HP-drain kit through longer engagements.
A sustained Scorch-DoT Discord comp that keeps enemies under constant Nightmare pressure — strongest in longer fights where the damage-over-time compounds.